I Switched My Laravel Notifications from Email to Telegram
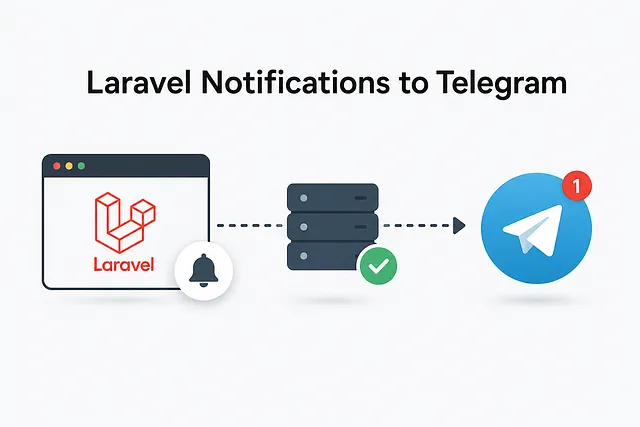
I Switched My Laravel Notifications from Email to Telegram
It’s been a while since I last wrote an article.
I’ve had a few ideas sitting in my notes, but between work, side projects, and everything else, I never got around to publishing any of them.
A few weeks ago, I was working on an internal Laravel project and needed a way to notify the admin whenever someone submitted a new request. The implementation wasn’t particularly complicated, but I ended up learning a few things along the way. Since it’s been a while since I wrote anything, I thought this would be a good topic to start with.
The Problem
The application was simple.
Whenever someone submitted a request, the admin needed to know about it as soon as possible. Waiting until someone opened the dashboard wasn’t ideal, especially during busy hours.
Email was the first thing that came to mind.
After checking the server, though, I realized it wasn’t going to be as straightforward as I expected. There was no SMTP server available, I didn’t have access to the domain’s DNS settings, and setting up a transactional email service would mean asking another team to make infrastructure changes.
For a feature that was only meant to notify internal staff, that felt like more work than it needed to be.
Then I thought about what our team was already using every day: Telegram.
We already had a group for internal discussions, everyone had the app installed, and Telegram provides a free Bot API. It seemed like a much better fit for this situation.
After a bit of testing, I had notifications showing up in our Telegram group every time a new submission was created.
Here’s how I set it up.
Why Telegram?
I wouldn’t use Telegram for everything.
If you’re sending password reset links, invoices, or other customer-facing notifications, email is still the better choice.
But for internal notifications, Telegram has a lot going for it.
- No SMTP server
- No DNS configuration
- Free to use
- Fast message delivery
- Simple HTTP API
For my use case, that was all I needed.
Step 1 — Create a Bot
Open Telegram and search for @BotFather.
Create a new bot by running:
/newbotBotFather will ask for a bot name and a username.
The username must end with bot.
For example:
submission_notification_botOnce it’s created, BotFather will send you a Bot Token.
It will look something like this:
123456789:AAExxxxxxxxxxxxxxxxxxxxxxxxxxxxxKeep this token somewhere safe. Laravel will use it to communicate with the Telegram Bot API.
Step 2 — Create a Group
Create a Telegram group for your team.
Mine is simply called Submission Notifications.
Invite everyone who should receive notifications, then add the bot to the group.
Step 3 — Get the Chat ID
Send any message inside the group.
Then open the following URL in your browser.
https://api.telegram.org/botYOUR_BOT_TOKEN/getUpdatesTelegram will return a JSON response similar to this:
{
    "chat": {
        "id": -1004307560709,
        "title": "Submission Notifications"
    }
}
Copy the value of chat.id.
That’s your group Chat ID.
Step 4 — Configure Laravel
Add both values to your .env file.
TELEGRAM_BOT_TOKEN=123456789:AAExxxxxxxxxxxxxxxxxxxxxxxxxxxxx
TELEGRAM_CHAT_ID=-1004307560709
Then expose them through config/services.php.
'telegram' => [
    'token' => env('TELEGRAM_BOT_TOKEN'),
    'chat_id' => env('TELEGRAM_CHAT_ID'),
],
Step 5 — Create a Telegram Service
I usually keep third-party integrations inside the Services directory so controllers stay focused on application logic.
Create a new file:
app/Services/TelegramService.phpThen add the following code:
<?php

namespace App\Services;

use Illuminate\Support\Facades\Http;

class TelegramService
{
    public function send(string $message): void
    {
        Http::post(
            'https://api.telegram.org/bot'.config('services.telegram.token').'/sendMessage',
            [
                'chat_id' => config('services.telegram.chat_id'),
                'text' => $message,
            ]
        );
    }
}
It’s a small class, but having the Telegram logic in one place makes it easier to maintain later.
Step 6 — Send the Notification
Whenever a new submission is stored, call the service.
$telegram->send(
"📥 New Submission

Applicant : John Doe
Service   : Information Request

https://your-domain.com/admin/submissions"
);
At this point, every new submission automatically sends a message to the Telegram group. No one has to keep refreshing the dashboard anymore.
One Small Improvement
If you’re already using Laravel queues, I’d recommend dispatching the notification as a queued job instead of sending it directly during the request.
SendTelegramNotificationJob::dispatch($submission);This keeps the request fast because the user doesn’t have to wait for the Telegram API to respond.
It also gives you automatic retries if the API is temporarily unavailable.
It’s not required for small projects, but it’s an easy improvement once everything is working.
Testing the Bot
Before wiring everything into your application, it’s worth checking that the bot can actually send messages.
A quick curl request is enough.
curl -X POST "https://api.telegram.org/botYOUR_BOT_TOKEN/sendMessage" \
-d "chat_id=YOUR_CHAT_ID" \
-d "text=Hello from Laravel!"
If the message appears in your Telegram group, everything is set up correctly.
Final Thoughts
I wasn’t trying to replace email. I just needed a simple way to notify a small group of people whenever something happened inside the application.
For this project, Telegram ended up being a better fit. There was no mail server to configure, no DNS records to verify, and everyone on the team already had Telegram open on their phone or desktop.